自动部署mdbook到githubpages,流程很简单,如下
1. github创建仓库:zouni
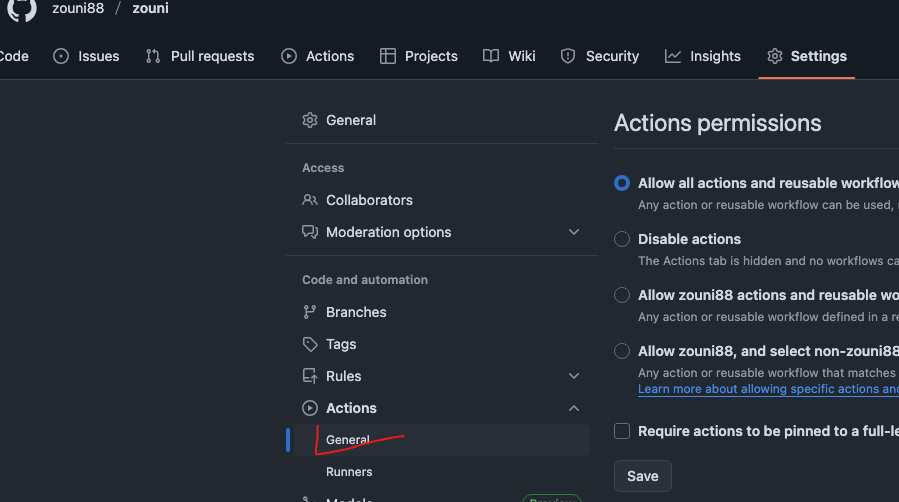
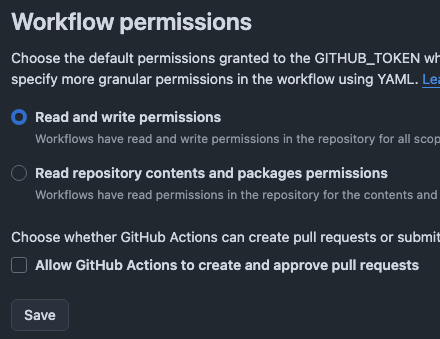
2. 仓库settings -> Actions -> General 下拉找到 Workflow permissions 选中第一项:工作流可读写权限,不勾选工作流没有操作权限
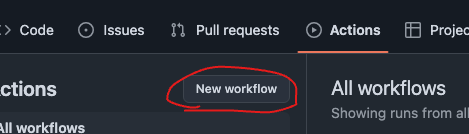
3. 接下来选中Actions,新建workflow,
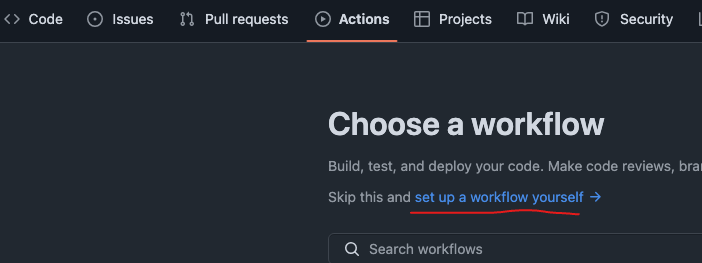
3.1 工作名字+工作流内容
name: Build and Deploy
# 监听 master 分支上的 push 事件
on:
  push:
    branches:
      - main
jobs:
  deploy:
    # 构建环境使用 ubuntu
    runs-on: ubuntu-latest
    steps:
      # 官方action, 将代码拉取到虚拟机
      - name: Checkout
        uses: actions/checkout@v3
        with:
          persist-credentials: false

      # 步骤 2:安装 Rust 环境(mdBook 依赖 Rust,官方核心步骤)
      - name: Install Rust toolchain
        uses: dtolnay/rust-toolchain@stable  # 官方推荐的 Rust 安装插件(稳定版)
        with:
          toolchain: stable  # 使用稳定版 Rust(避免 nightly 版本兼容性问题)

      # 步骤 3:缓存 Rust 依赖(官方推荐,加速后续构建,减少重复下载)
      - name: Cache Rust dependencies
        uses: Swatinem/rust-cache@v2  # 官方推荐的 Rust 缓存插件

      # 步骤 4:安装 mdBook(工作流环境是全新的,需重新安装,官方步骤)
      - name: Install mdBook
        run: cargo install mdbook  # 与本地安装命令一致,官方标准方式

      - name: Build mdBook
        run: mdbook build  # 官方标准构建命令,生成 HTML/CSS/JS 等静态文件

      # 部署
      - name: Deploy
        uses: JamesIves/github-pages-deploy-action@v4.3.3
        with:
          # 项目配置的打包目录名称
          folder: book
          # 部署后提交到的分支
          branch: static-pages
4. 完成以上回到Actions会看到工作流已经在运行,等一会儿会自动创建好分支static-pages,接下来重新回到Settings
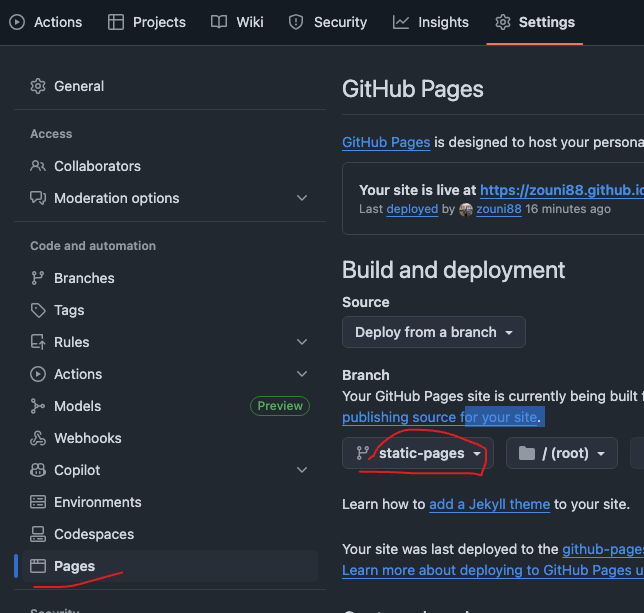
5. 完成以上,回到Actions,等待工作流运行结束,就可以访问了username.github.io/mysite
参考资料: https://blog.csdn.net/weixin_43233914/article/details/134174562